Thursday, July 4, 2013

Handy Tip #7


I've often found myself with bananas that ripen to the point of having totally brown peels--not bad yet, but likely not going to last another day or two. On a hunch, I once tried freezing them (I like to use over-ripe bananas for banana bread, but I don't always have the time and ingredients to do it right away). It was fantastic: The bananas froze well, then I thawed them and mashed them to make the banana bread. It was great.

So, if you have over-ripe bananas that aren't going to last much longer before they go from super-ripe to bad, throw them in the freezer--peel and all. You don't have to prep them in any way.
When you're ready to make the bread, take them out and thaw them. They are easy to peel.

I actually put mine in my toaster oven to get them to thaw faster. The bananas got mushy, though, and did not entirely maintain their original shape--so if you thaw them in the oven or microwave, make sure you put them in or on something. Don't just throw a frozen banana on the oven rack! (I never actually did this, but I can deduce the result. ;) )

You can also thaw mashed bananas in a baggie, to use for later.
Photo source: http://www.finecooking.com/item/5694/bananas

Tuesday, July 2, 2013

Art Class #3


If you read my last post about my Going Green in Art project, you'll know that it didn't go over so well with the age group I was working with. So, instead of doing the pt.2 as planned, I moved on to the lentils project.

Originally, I was going to have the kids do some kind of mural with lentils. But my mother pointed out that I'd been doing a lot of that kind of thing already, and--when I told her about how the last class went over--she suggested I just give them clay to work with.
I decided to do the lentil project using clay--and it was a big hit.

I was supposed to have three kids today--a 9 year-old girl, a 7 year-old boy, and a 5 year-old girl. However, the boy (whose sister is the 9 year-old) got swapped out for another girl.
(I didn't know before hand, but I'm pretty laid back, so it was okay. The girl is also 11, which is higher than the age cut off I'd originally set in place.)

Considering the age span, this was a great project. All three of them were really into it, and really excited about it.
(I'm not sure if the success of this class had anything to do with the class being all girls--like, if the girls were more comfortable together. I'm pretty much positive that boys would enjoy this too--mainly, it's the personality of the kid and whether or not (s)he's creative that matters, more than the gender.)

I had out two plates of orange and green lentils. I like to give the kids room to express themselves, as I've said before, so I gave them each a chunk of clay and told them to make whatever they wanted.
I told them they could stick the lentils on the wet clay, wait for it to dry and then glue them, not use lentils at all, etc. In general, I try to encourage each child to make the project her own.

The girls loved working with the clay, and were also fascinated with the lentils.
Lentils pressed in; some still fell off anyway.
Example I made the night before. Was a turtle, but his
still-drying legs broke off. Whoops. 
I personally have found so far that the lentils tend to fall out of the clay as it begins to dry, unless they are pushed in really deeply, or kneaded in before being sculpted. The clay projects are staying with me to dry until next week, at which point I told the girls they can glue on any that fall off.

Kneaded in. Not my preference. 


The 5 year-old asked multiple times for more clay, and ended up making a lot of little projects (in large part because she was less focused on details, being 5). A few times, I had to encourage her to try making something else because she'd finished before our class was over, but she didn't need much prompting and she didn't seem to get bored. The girls and I also talked about various things, and that helped keep everyone entertained.

This project was so easy. I used a tub of Crayola air-dry clay I bought at Target for around $5, and some lentils (I used some my mom had gotten already at the Farmer's Market). The finished sculptures were placed on different paper plates that they can dry on (and I can move around easily).


I was and still am incredibly pleased and impressed with the creativity the girls showed, as displayed below.
This was probably my favorite class so far!
Love this!!

The one I worked on while the girls were working. ;)
Think I'm going to try gluing the lentils on after it dries this time.


Handy Tip #6


This Handy Housewife Tip is particularly useful if you have curly color-treated hair (aka, prone to frizzy-ness and dryness), like I do.

After washing your hair, apply a heavy amount of conditioner. Pile the damp, goopy hair up on top of your head, and cover it with a shower cap. Go about your house hold tasks with the cap over your hair.
Now, even while you vacuum, you are getting a nice conditioning treatment!

Rinse the conditioner out, and enjoy silky, moistened hair.

(I think I actually left my cap on for multiple hours because I was so busy, and I was really pleased with how hydrated my hair ended up being. Also, I bought my shower cap at Dollar Tree!)


I bought the blue one in the middle. ;)
Check out your local Dollar Tree and get one of your own!


Sunday, June 30, 2013

Art Class #2


Sorry this post is so late--had a bit of a crazy week, because my husband left suddenly for a business trip and to take care of some family stuff. (As such, I haven't yet taken pictures of all the different pieces I cut out of magazine for this project, but keep an eye out for an updated version of this post that includes them!)

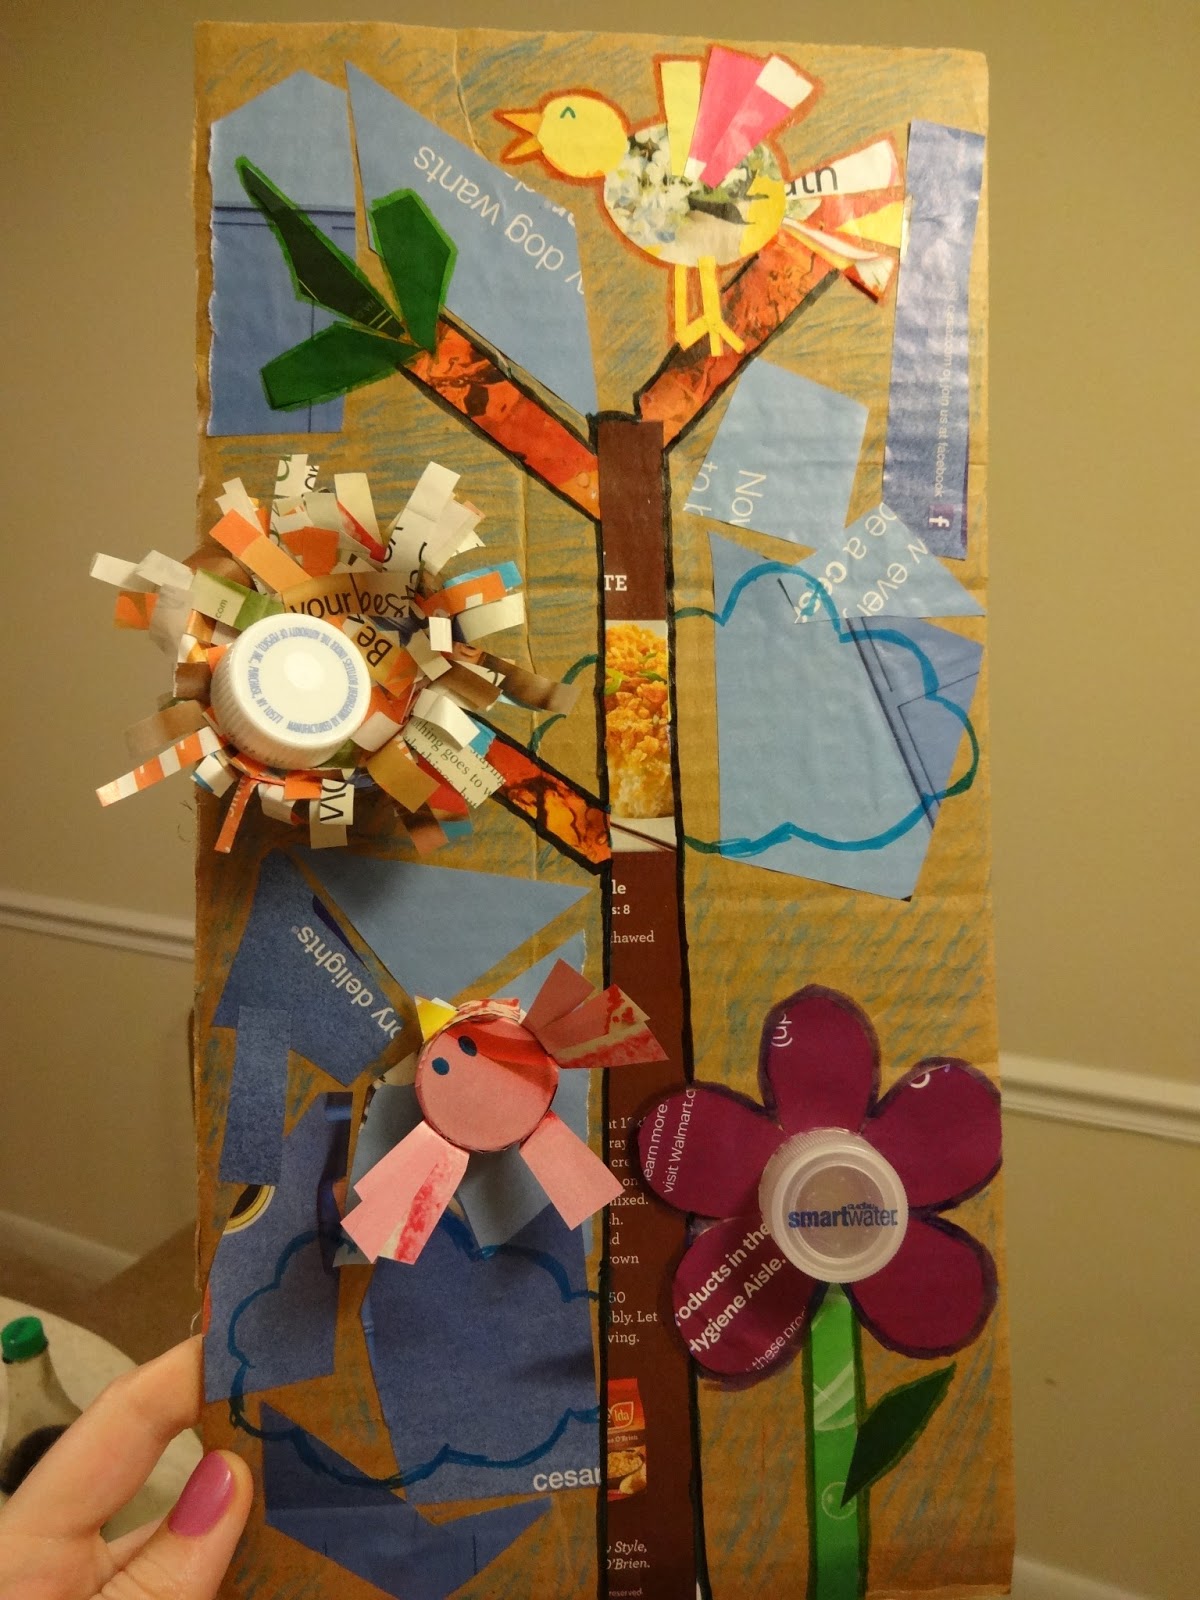
My art class theme from last week was Going Green in Art, and involved making a mural out of recyclable goods. (I think the only materials we used that weren't specifically recyclable were glue and markers/pencils/pens.)


Before I go into details, I will say this: This project was a little too complicated and detailed for the age group I was working with. The oldest of the group, a nine year old girl, did pretty well with it. But the younger kids--youngest being five, I think--1) lost interest and got distracted pretty quickly, and 2) had a lot of trouble doing this project without a lot of help. I think this project idea is cute and fun, but maybe for an age group more like 9-13.


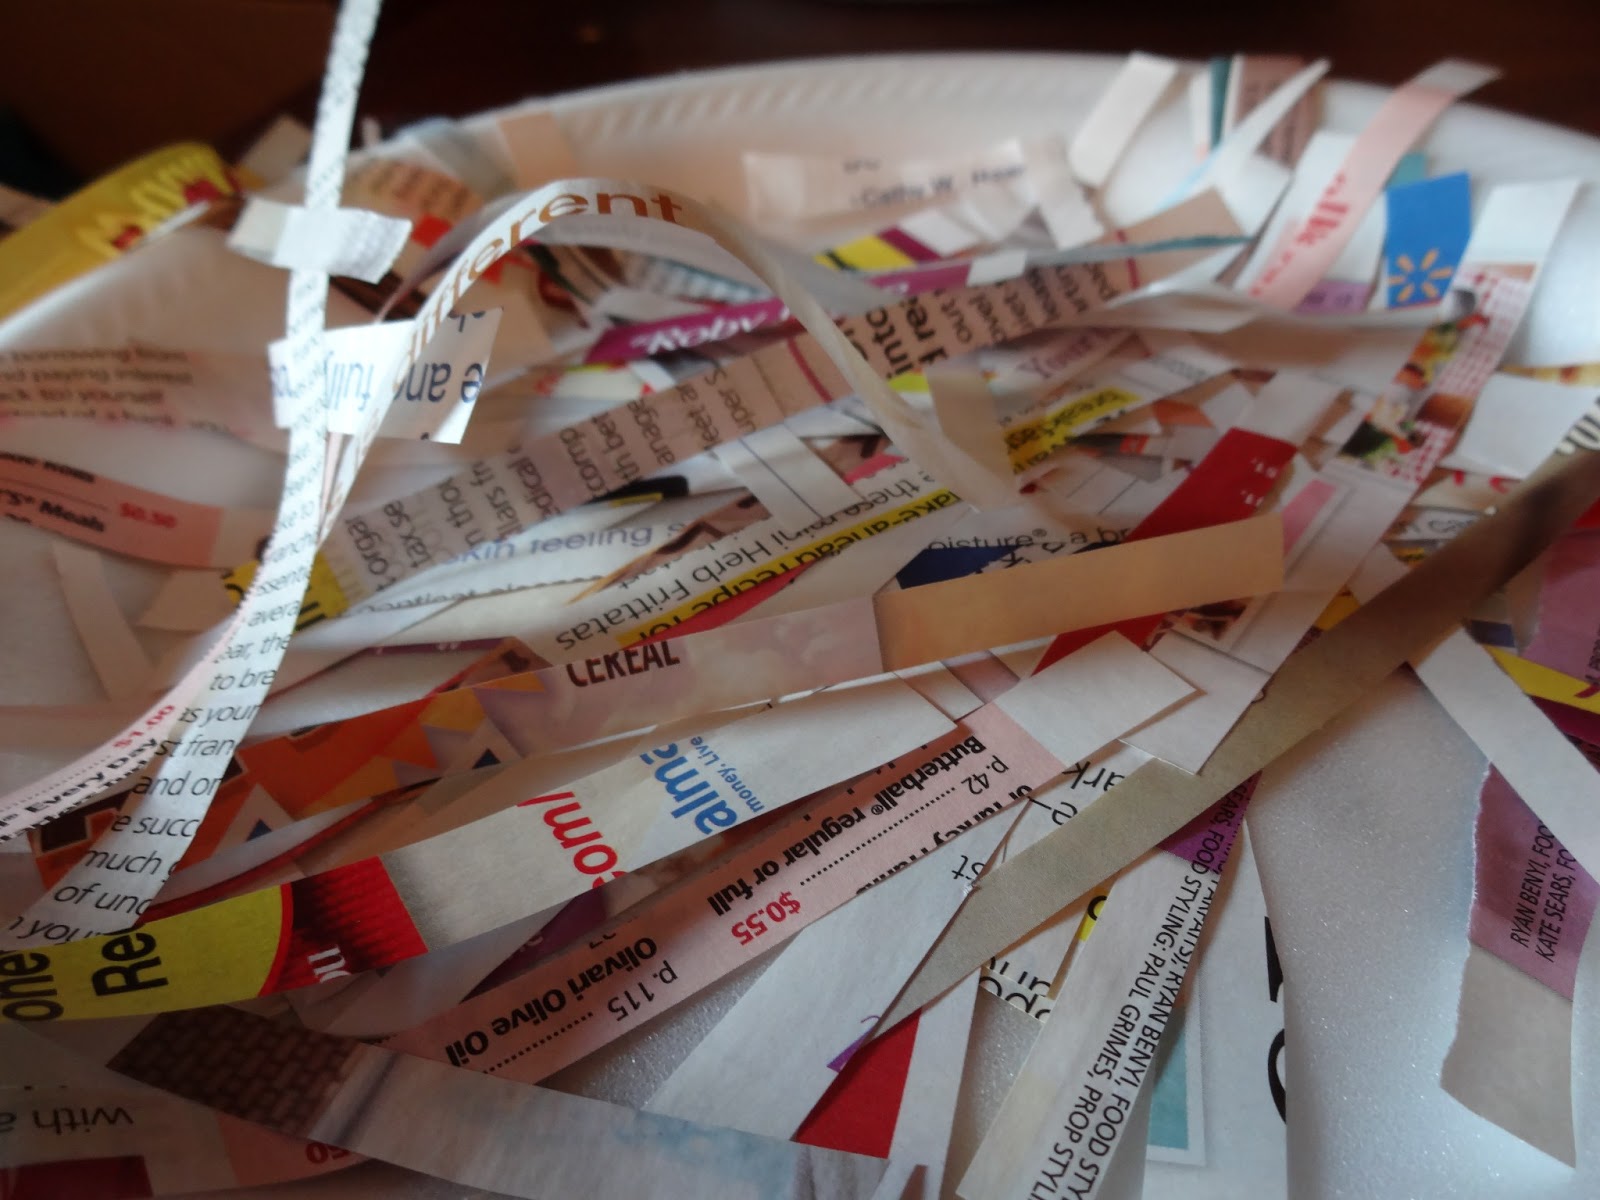
Before this class, I had cut out all the needed pieces from magazine. I cut out petal shapes for the flower petals; different sized circles for the flat birds; pieces for the leaves, stems, and tree trunks; pieces for the sky; pieces for the feathers; and pieces for the bottle cap birds.
I put the different pieces on different paper plates so the kids could get to them easily. I also had a plate of just all different shapes and sizes of magazine scraps and clips.
Petals

Scraps and pieces of sky

Leaves


To begin, I gave each child a piece of cardboard from some boxes that were being thrown away.
There were so many different pieces and components, that I decided to do each part step-by-step. I had the kids start with the trees and backgrounds. Again, the majority of kids in my class were too young for this project, and became bored and restless quickly.


As you can see from the pictures, most of the project was basic gluing of magazine scraps to make a mural. I will also explain how to make the nests, and the bottle cap birds.


Nests:

The nests were fun and simple (though not really simple enough for my class's age group, again).

Some fruit comes packaged in clear cartons with indentations for the fruit to sit in, much like an egg carton, but for fruit.
I was originally going to use actual egg cartons for this project, but someone gave me an old fruit carton, and I used it instead.
For either type of carton, you'll need to cut out each individual "cup." These will be the bases for the nests.
Side view: The "cup" is clear. 
Next, use a glue stick to spread glue around the whole inside of the cup. Glue in strips of magazine or newspaper. (After the first layer, it's difficult to use the glue stick to add more paper shreds, so I switched to liquid glue: a swirl in the middle, on top of the shreds already glued in. This can be repeated for as many layers as you want in your nest.)
After the strips have been glued in, you can glue in a bottle cap to be the "egg." I used a glue stick to put glue around the bottom edge of the cap, and then just stuck it on.
Then all that's left is to swipe some glue onto the bottom of the nest cup, and stick it onto the cardboard wherever you want it.


Bottle cap birds:


I pre-measured and cut circles and strips out of magazine.
To start the bird, use a glue stick to put glue all around the outside edge of the cap. Stick the long strip of magazine onto the edge, so that it goes all the way around and covers the sides.
Next, glue the circle to the top of the bottle cap. This is the beginning of the bird.


I had cut out small "feathers" from magazine (which were used for the flat bird as well), and used these for the wings.
 I placed a small amount of glue on one side of the "bird body" and used three feathers to make one wing. (I found: If you want yellow wings and one side of the magazine feathers is yellow, then glue the feathers on so that the yellow side is facing in. Then, the "wings" can be folded down slightly, to make them stand out straight instead of standing straight up.)
Repeat the same for the other side.
I used a larger, more blocky single "feather" for the tail, gluing it to the back of the cap.
For the "beak," I cut a small diamond shape out of yellow from a magazine. I then folded it to form an opened beak, and glued it on the front. I drew the eyes on with marker.

(This might be slightly confusing without more pictures to illustrate with; if so, bear with me until I take and upload more pictures of the process!)

You can find other fun ways to use the bottle caps as well, such as the middle of the flower (pictured above), or even something like a sun shining in the sky. Be creative!

The sort of "theme" I was aiming for in the murals was one of life and renewal, since it has to do with using old things that would be thrown away, to make new things.

And, of course, here are the pictures of the projects the kids made:

Six year old's project

Eight year-old's project

Seven year-old's project
Nine year old's project so far; she plans to work on
it more during the coming class.
Five year-old's project

Tuesday, June 25, 2013

In...


Nailed It


Excellent quote from the movie "Just Married," starring Ashton Kutcher and Brittany Murphy.
While I'm not a huge Kutcher fan, I found this movie to be brilliant--a must watch for married couples (especially new and young!).

Unfortunately, I couldn't find any of the clips I wanted on Youtube, but here's the advice from Tom's (Kutcher's character) dad when it seems like the new couple is going to get a divorce after getting back from their honey moon. His dad totally nails it.


Tom: I just don't know if love is enough anymore.
Dad: What do you mean, "enough"?
Tom: I mean... Even if Sarah and I do love each other... maybe we did need more time to get to know each other.
Dad: So...
[clears throat]
Dad: What your saying here is... you had a couple of bad days in Europe and... it's over. Time to grow up, Tommy.
Tom: Hmm?
Dad: Some days your mother and me loved each other. Other days we had to work at it. You never see the hard days in a photo album... but those are the ones that get you from one happy snapshot to the next. I'm sorry your honeymoon stunk but that's what you got dealt. Now you gotta work through it. Sarah doesn't need a guy with a fat wallet to make her happy. I saw how you love this girl. How you two lit each other up. She doesn't need anymore security than that.
Tom: Thanks, dad.